How to Create a BOM in Siemens NX
A practical guide to creating Bills of Materials in Siemens NX, what the built-in tools handle well, and where they fall short.

Siemens NX is a powerful CAD platform, widely used within automotive, aerospace, and manufacturing industries. In the past few years it's also gained some traction from college students. Learning to create a Bill of Materials and proceeding from there can be a chore to start out.
This guide walks through how to create a BOM in Siemens NX and where the software starts to fall short.
Method 1: Export from the Assembly Navigator
For those needing an export to Excel, this is for you.
-
Start by opening an assembly in Siemens NX. Pay attention to the left sidebar where you will find the Assembly Navigator panel. You can expand it to see all the selected columns and details regarding your components. However, not all details are visible here — we are going to change that.
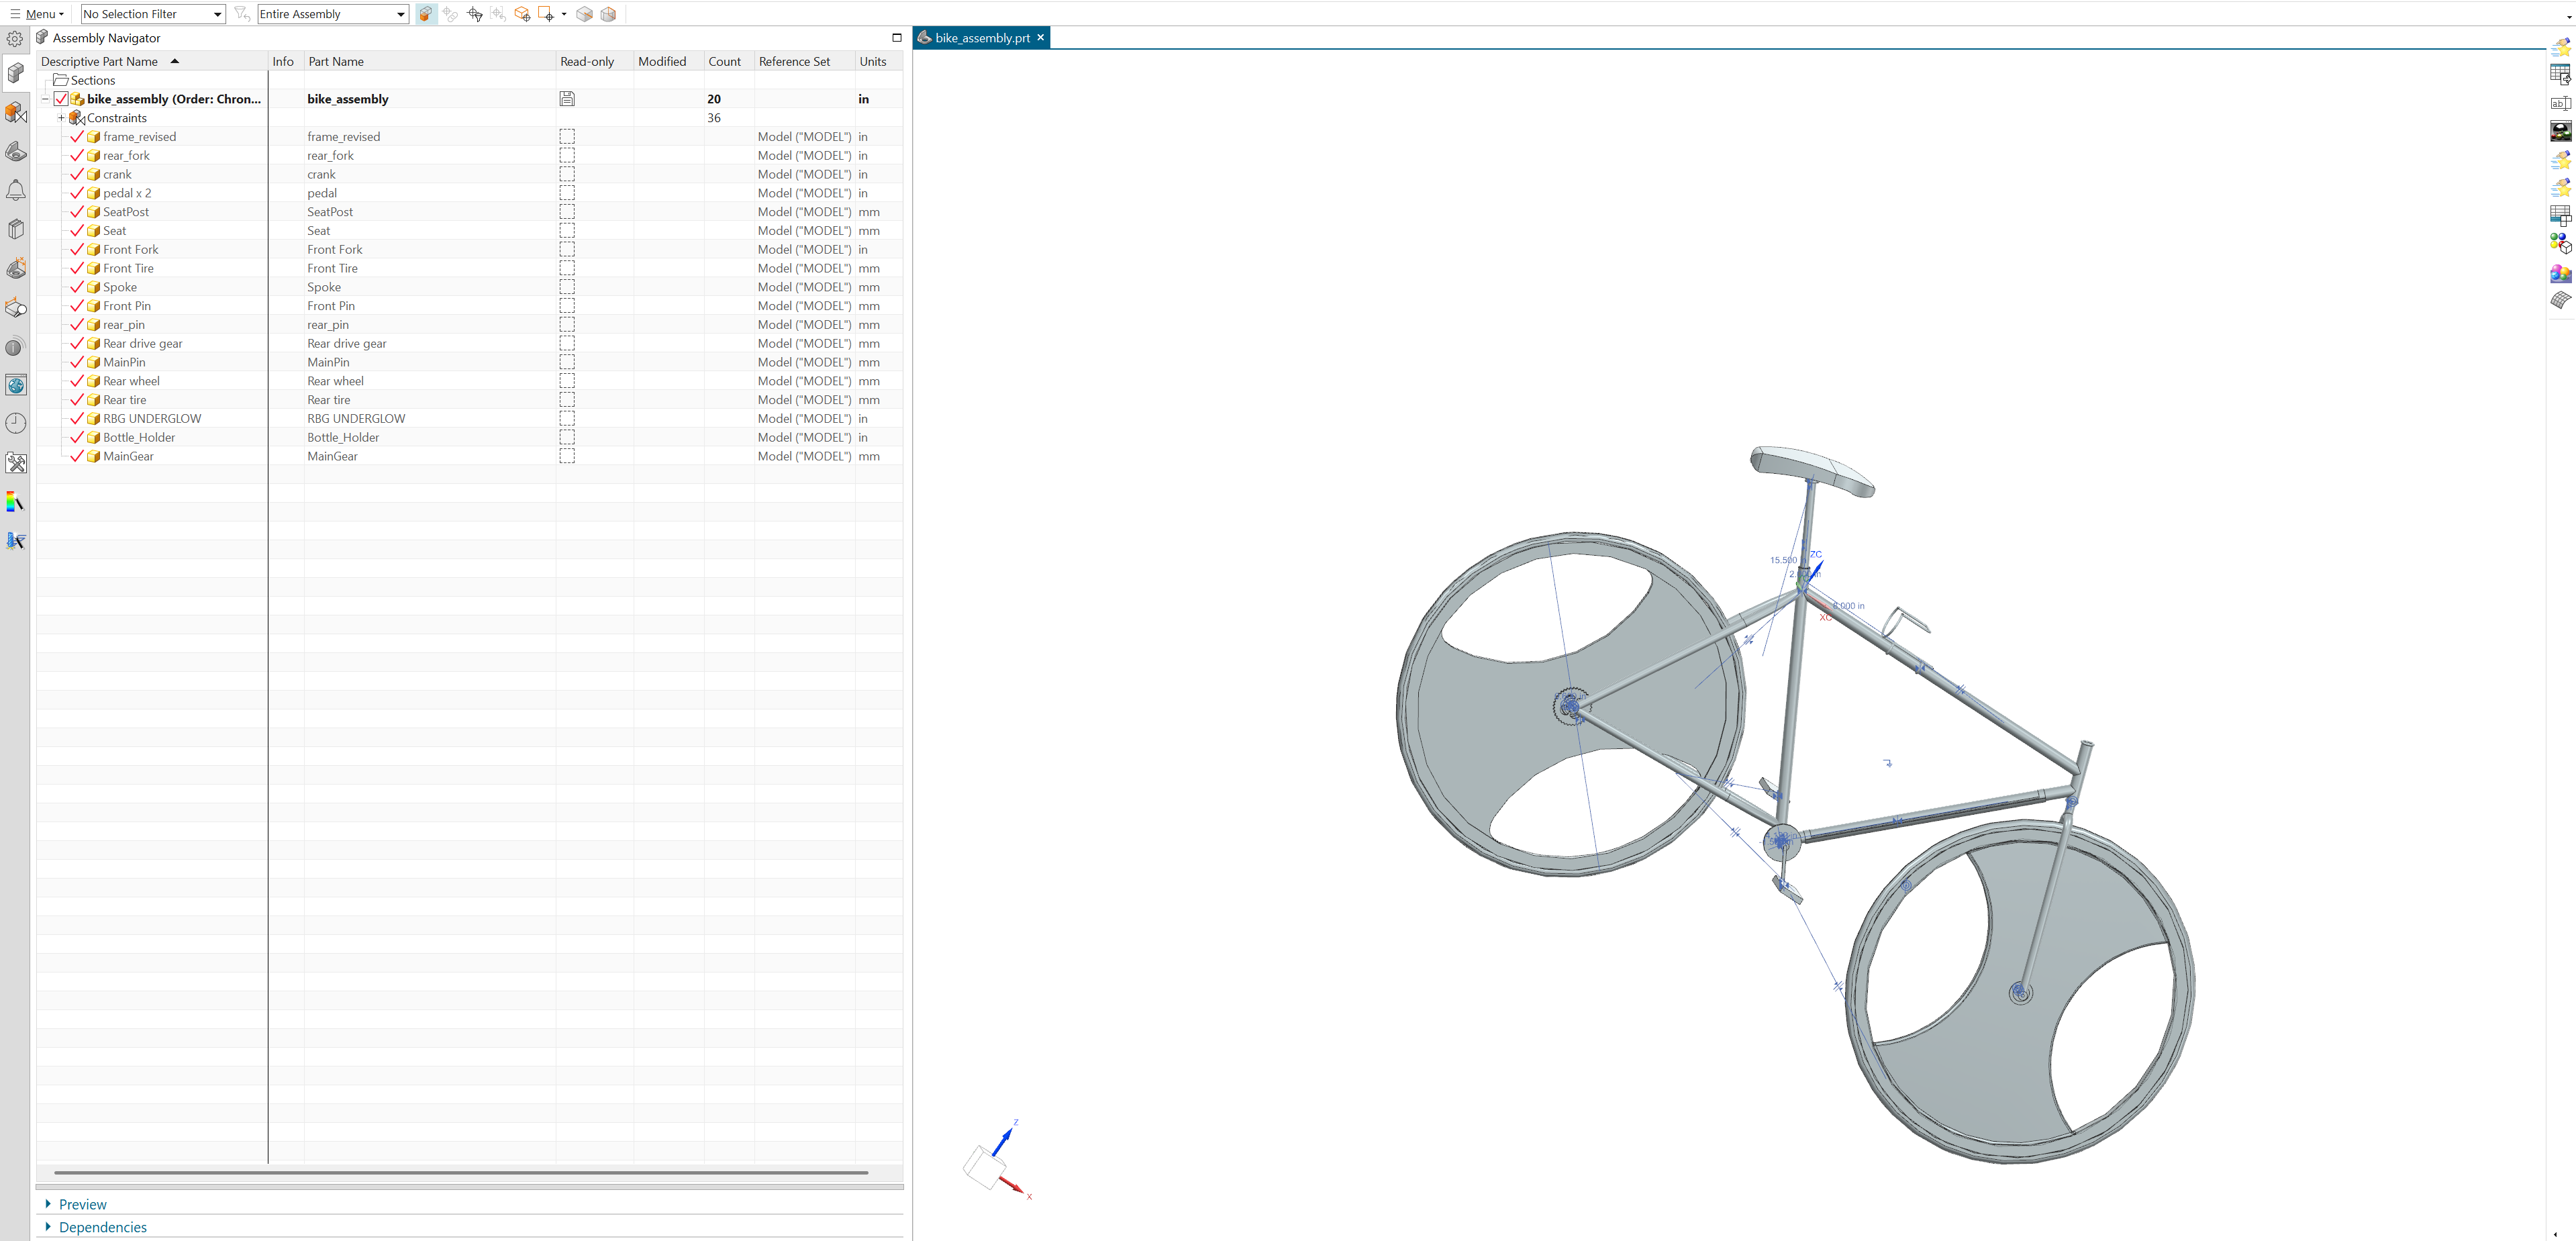
Expand the Assembly Navigator to see your full component list -
Right-click the top row in the Assembly Navigator to access the column options. In Columns > Columns, pick out what descriptors you want added like Mass, Quantity, etc.
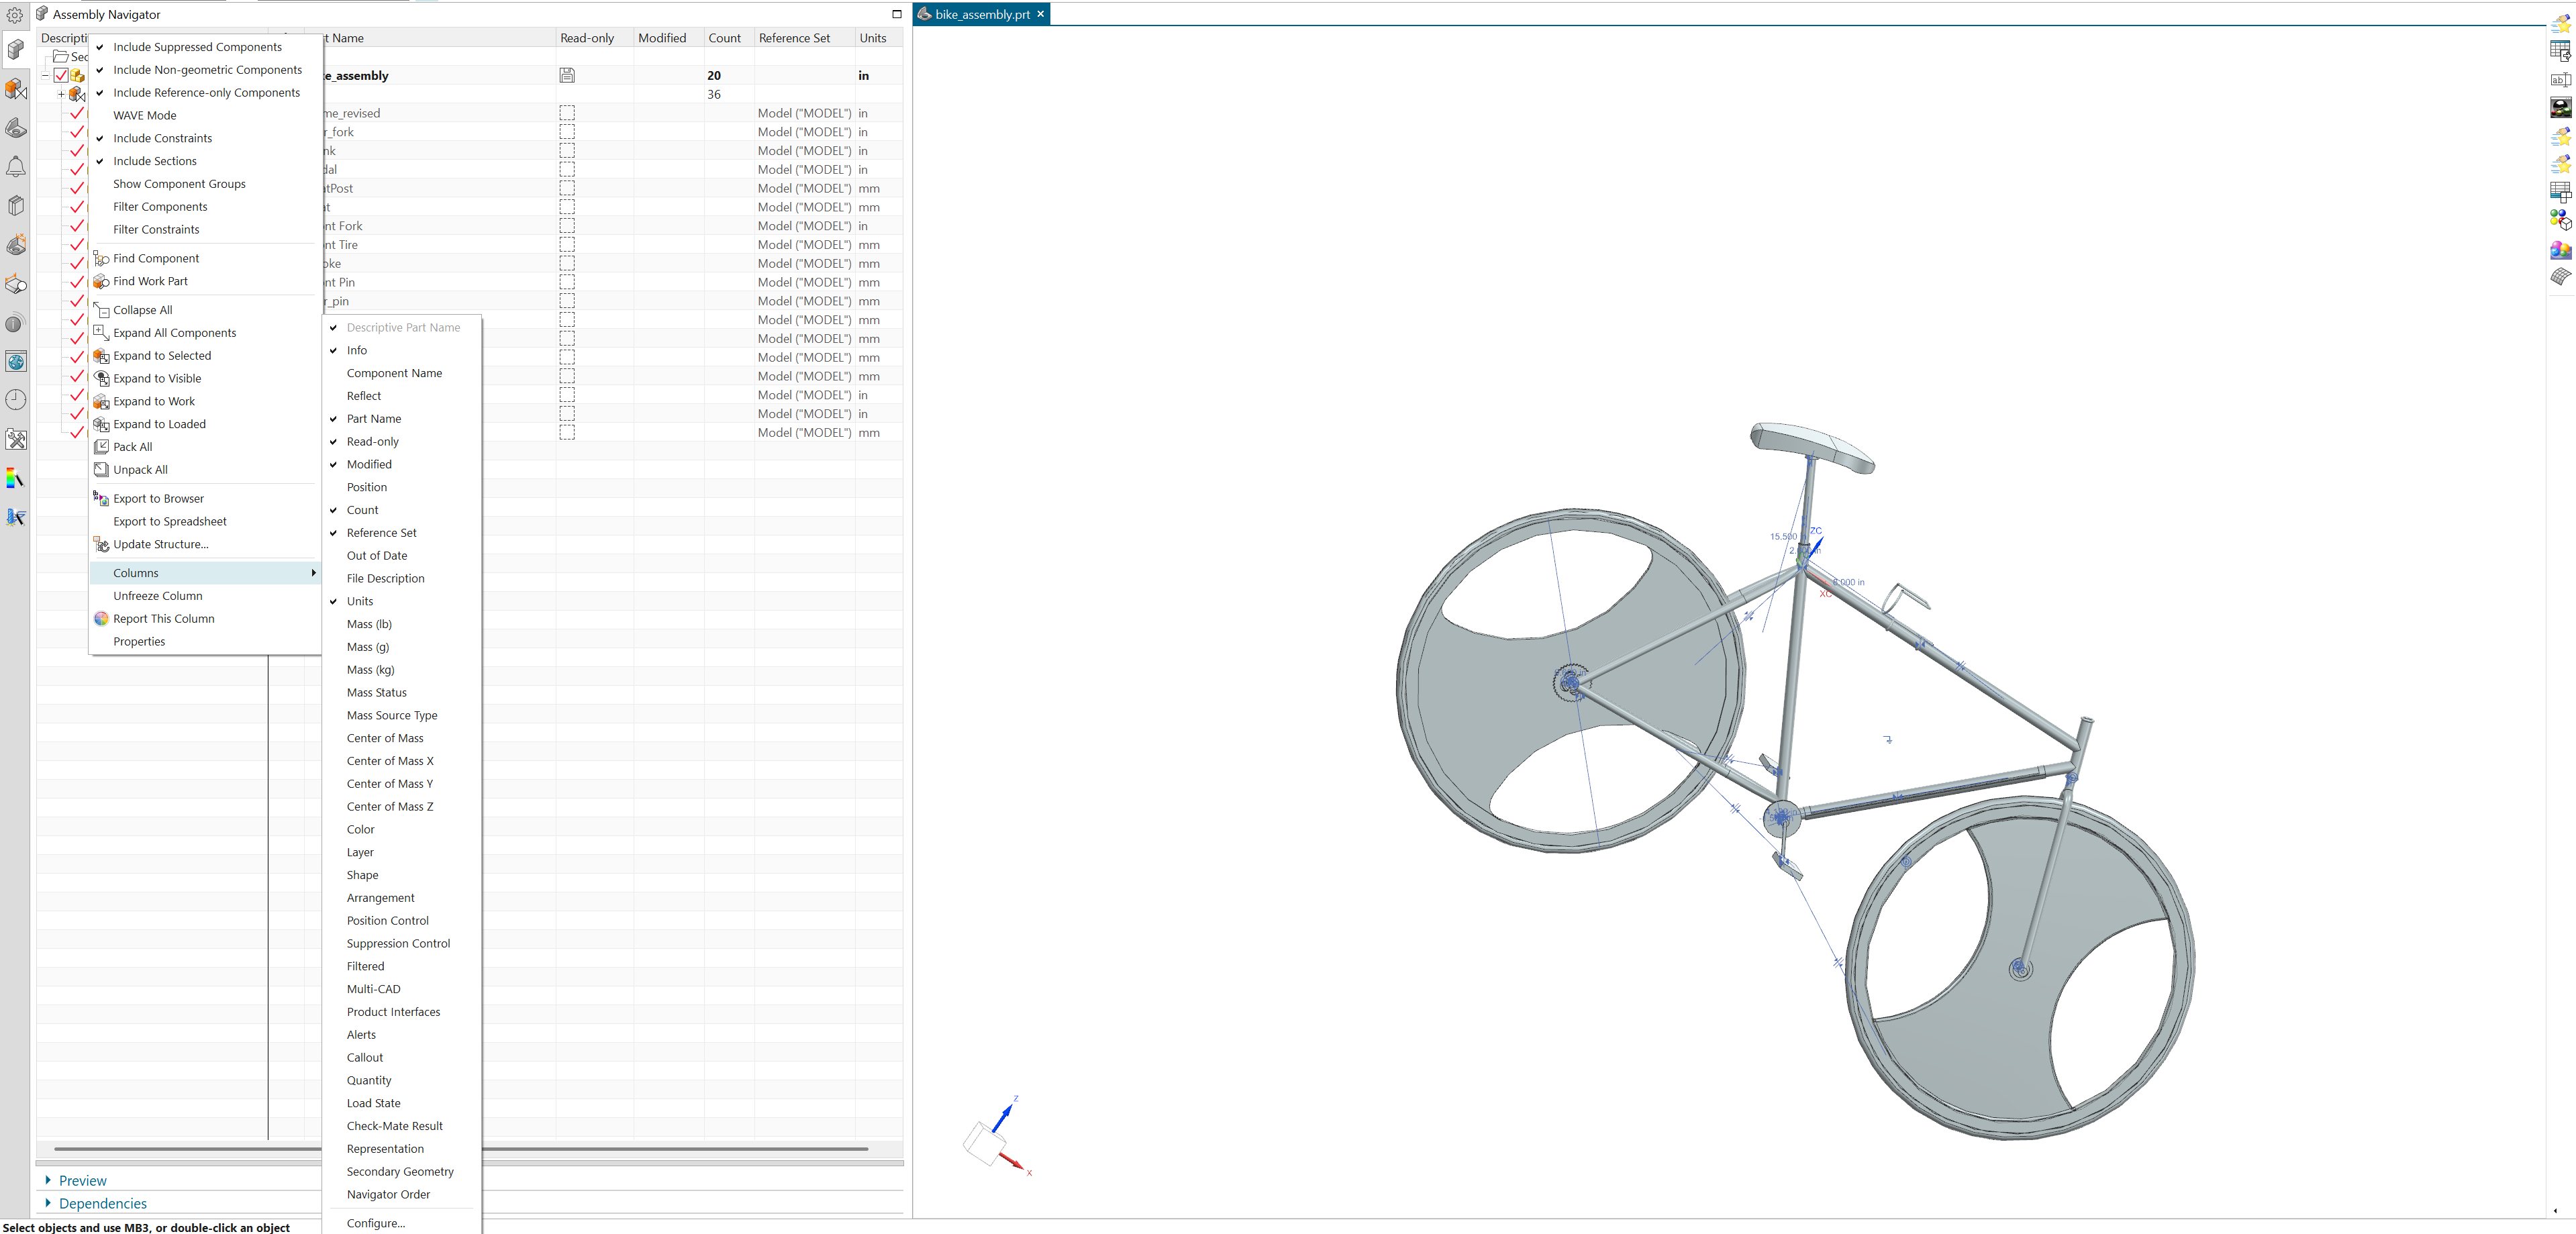
Right-click to customize columns — add Material, Mass, Quantity, and other descriptors -
When you feel confident with your setup, right-click again on the top row in the Assembly Navigator. Then click on Export to Spreadsheet which will open the local Excel application on your computer (should you have it installed, it will warn you otherwise). It will allow you to then save as an
.xlsxfile.


When this works well
This works great if you just need all your information down quickly into an Excel spreadsheet.
Where it breaks down
- Whatever columns you selected reflect back into the exported Excel file (i.e. whatever information you need in Excel, make sure your Assembly Navigator shows that)
- Sub-assembly hierarchy shows up as indentation (blank spaces in cells) rather than a clean multi-level structure
- No revision tracking — if you export again next week, it's not easy to track your changes
Method 2: Parts List in a Drawing
If you need a BOM table on an engineering drawing, this is the more formal route.
Big asterisk here: there is no way to output to Excel. This method only works for .html and .txt.
-
From an assembly, create a drawing sheet. You can do so by searching for New Sheet or by executing this command on your keyboard: CTRL + SHIFT + D
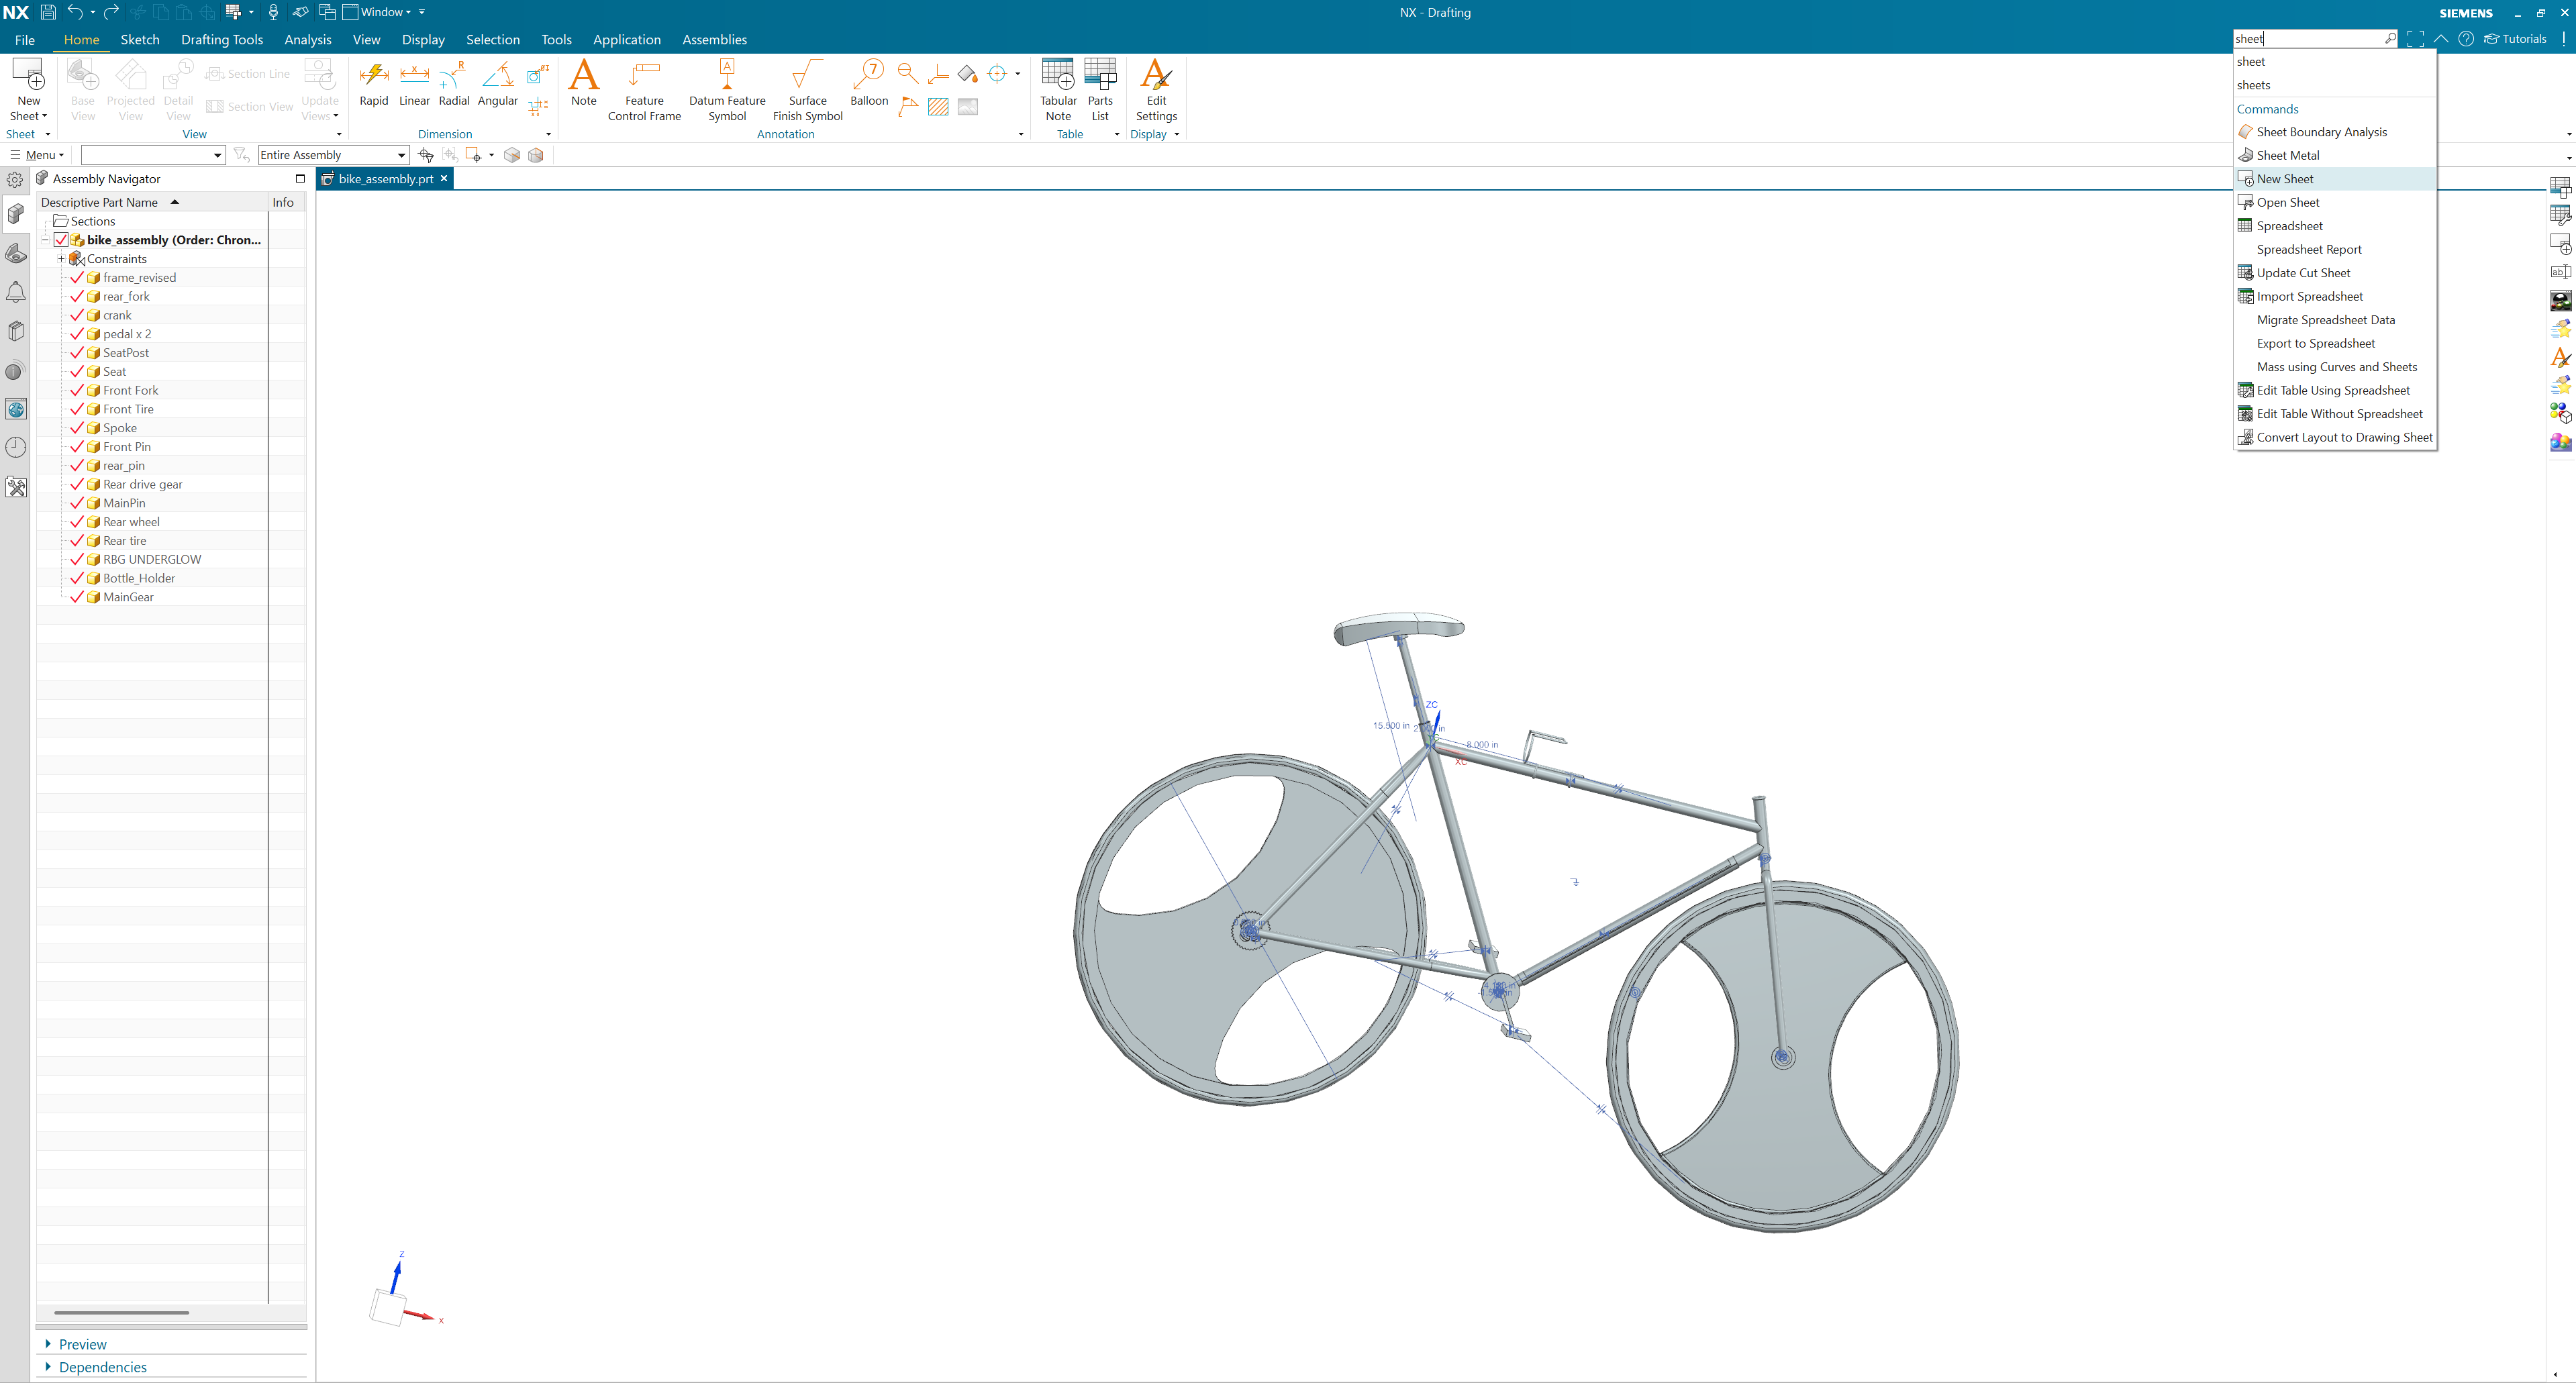
Add a new drawing sheet for your assembly -
Ensure you've selected a suitable size for your workspace. Up at the top you will see a Parts List command in the Home Tab/ribbon. You can also decide to search for Parts List as a command in the top right.
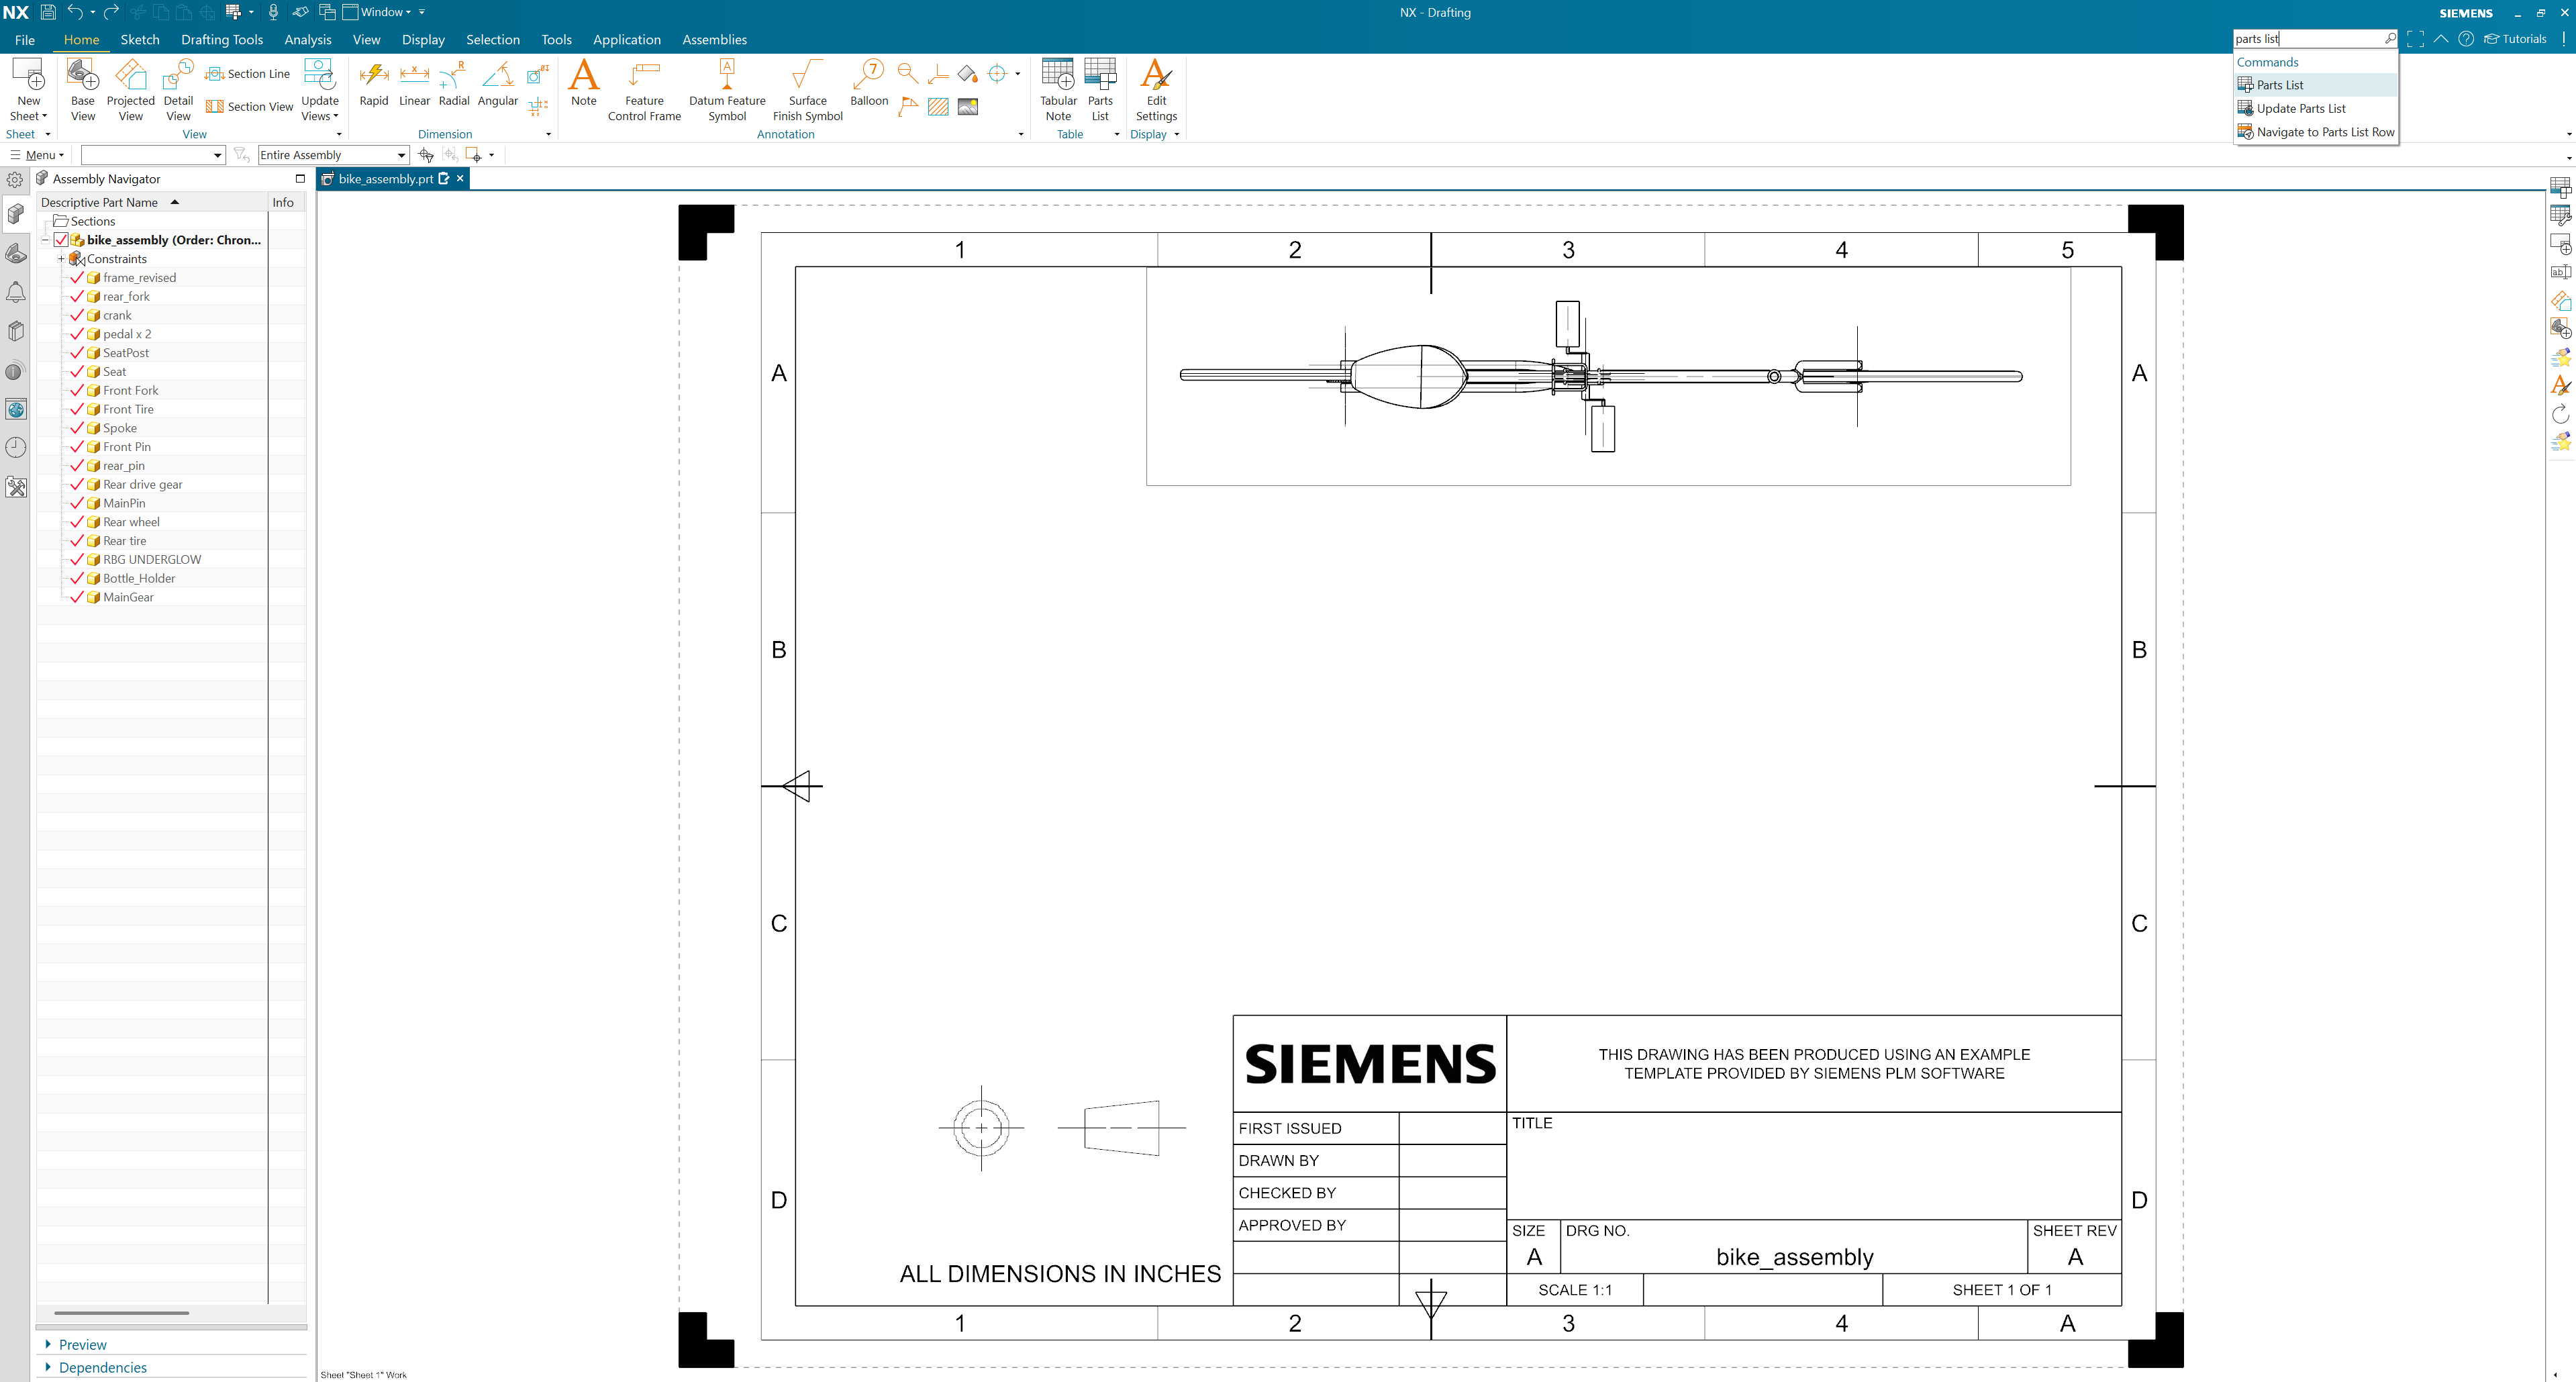
Access the Parts List command from the ribbon -
Your parts list may appear too big, in which case you will need to adjust the size of your table by going into its settings. After this, your table will be filled with part numbers, names, and quantities.
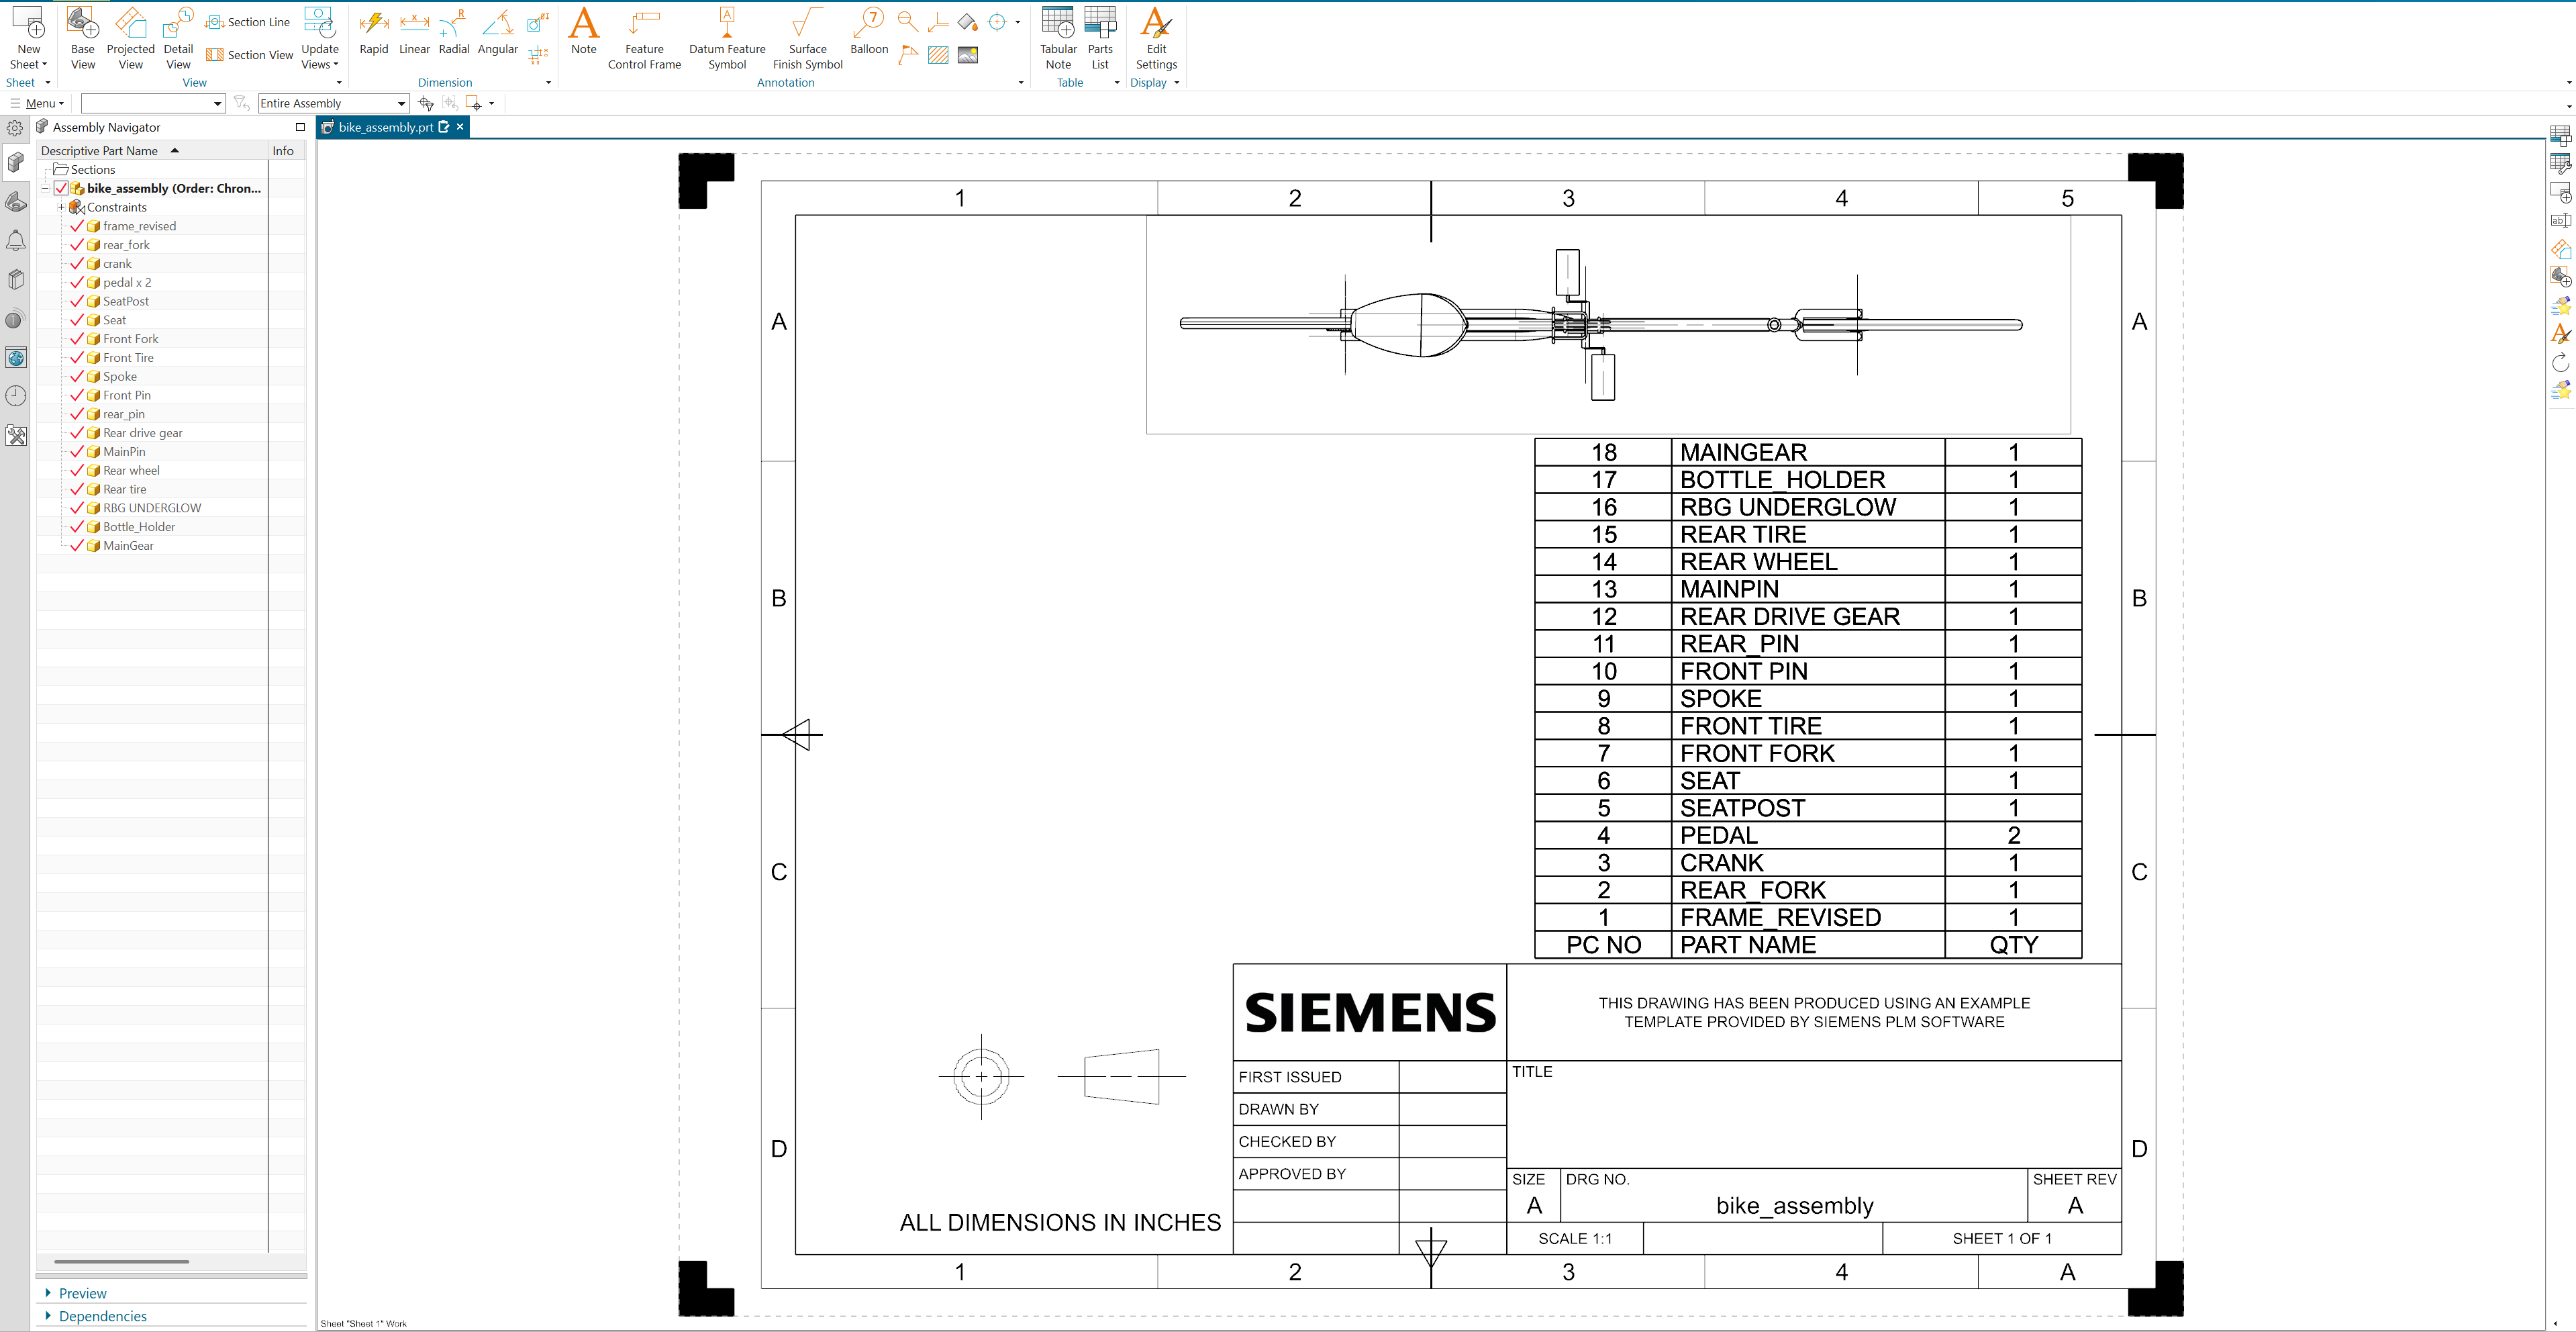
The finished Parts List on your drawing -
To export, right-click the top-left corner cell of the Parts List table. Select Export from the context menu.
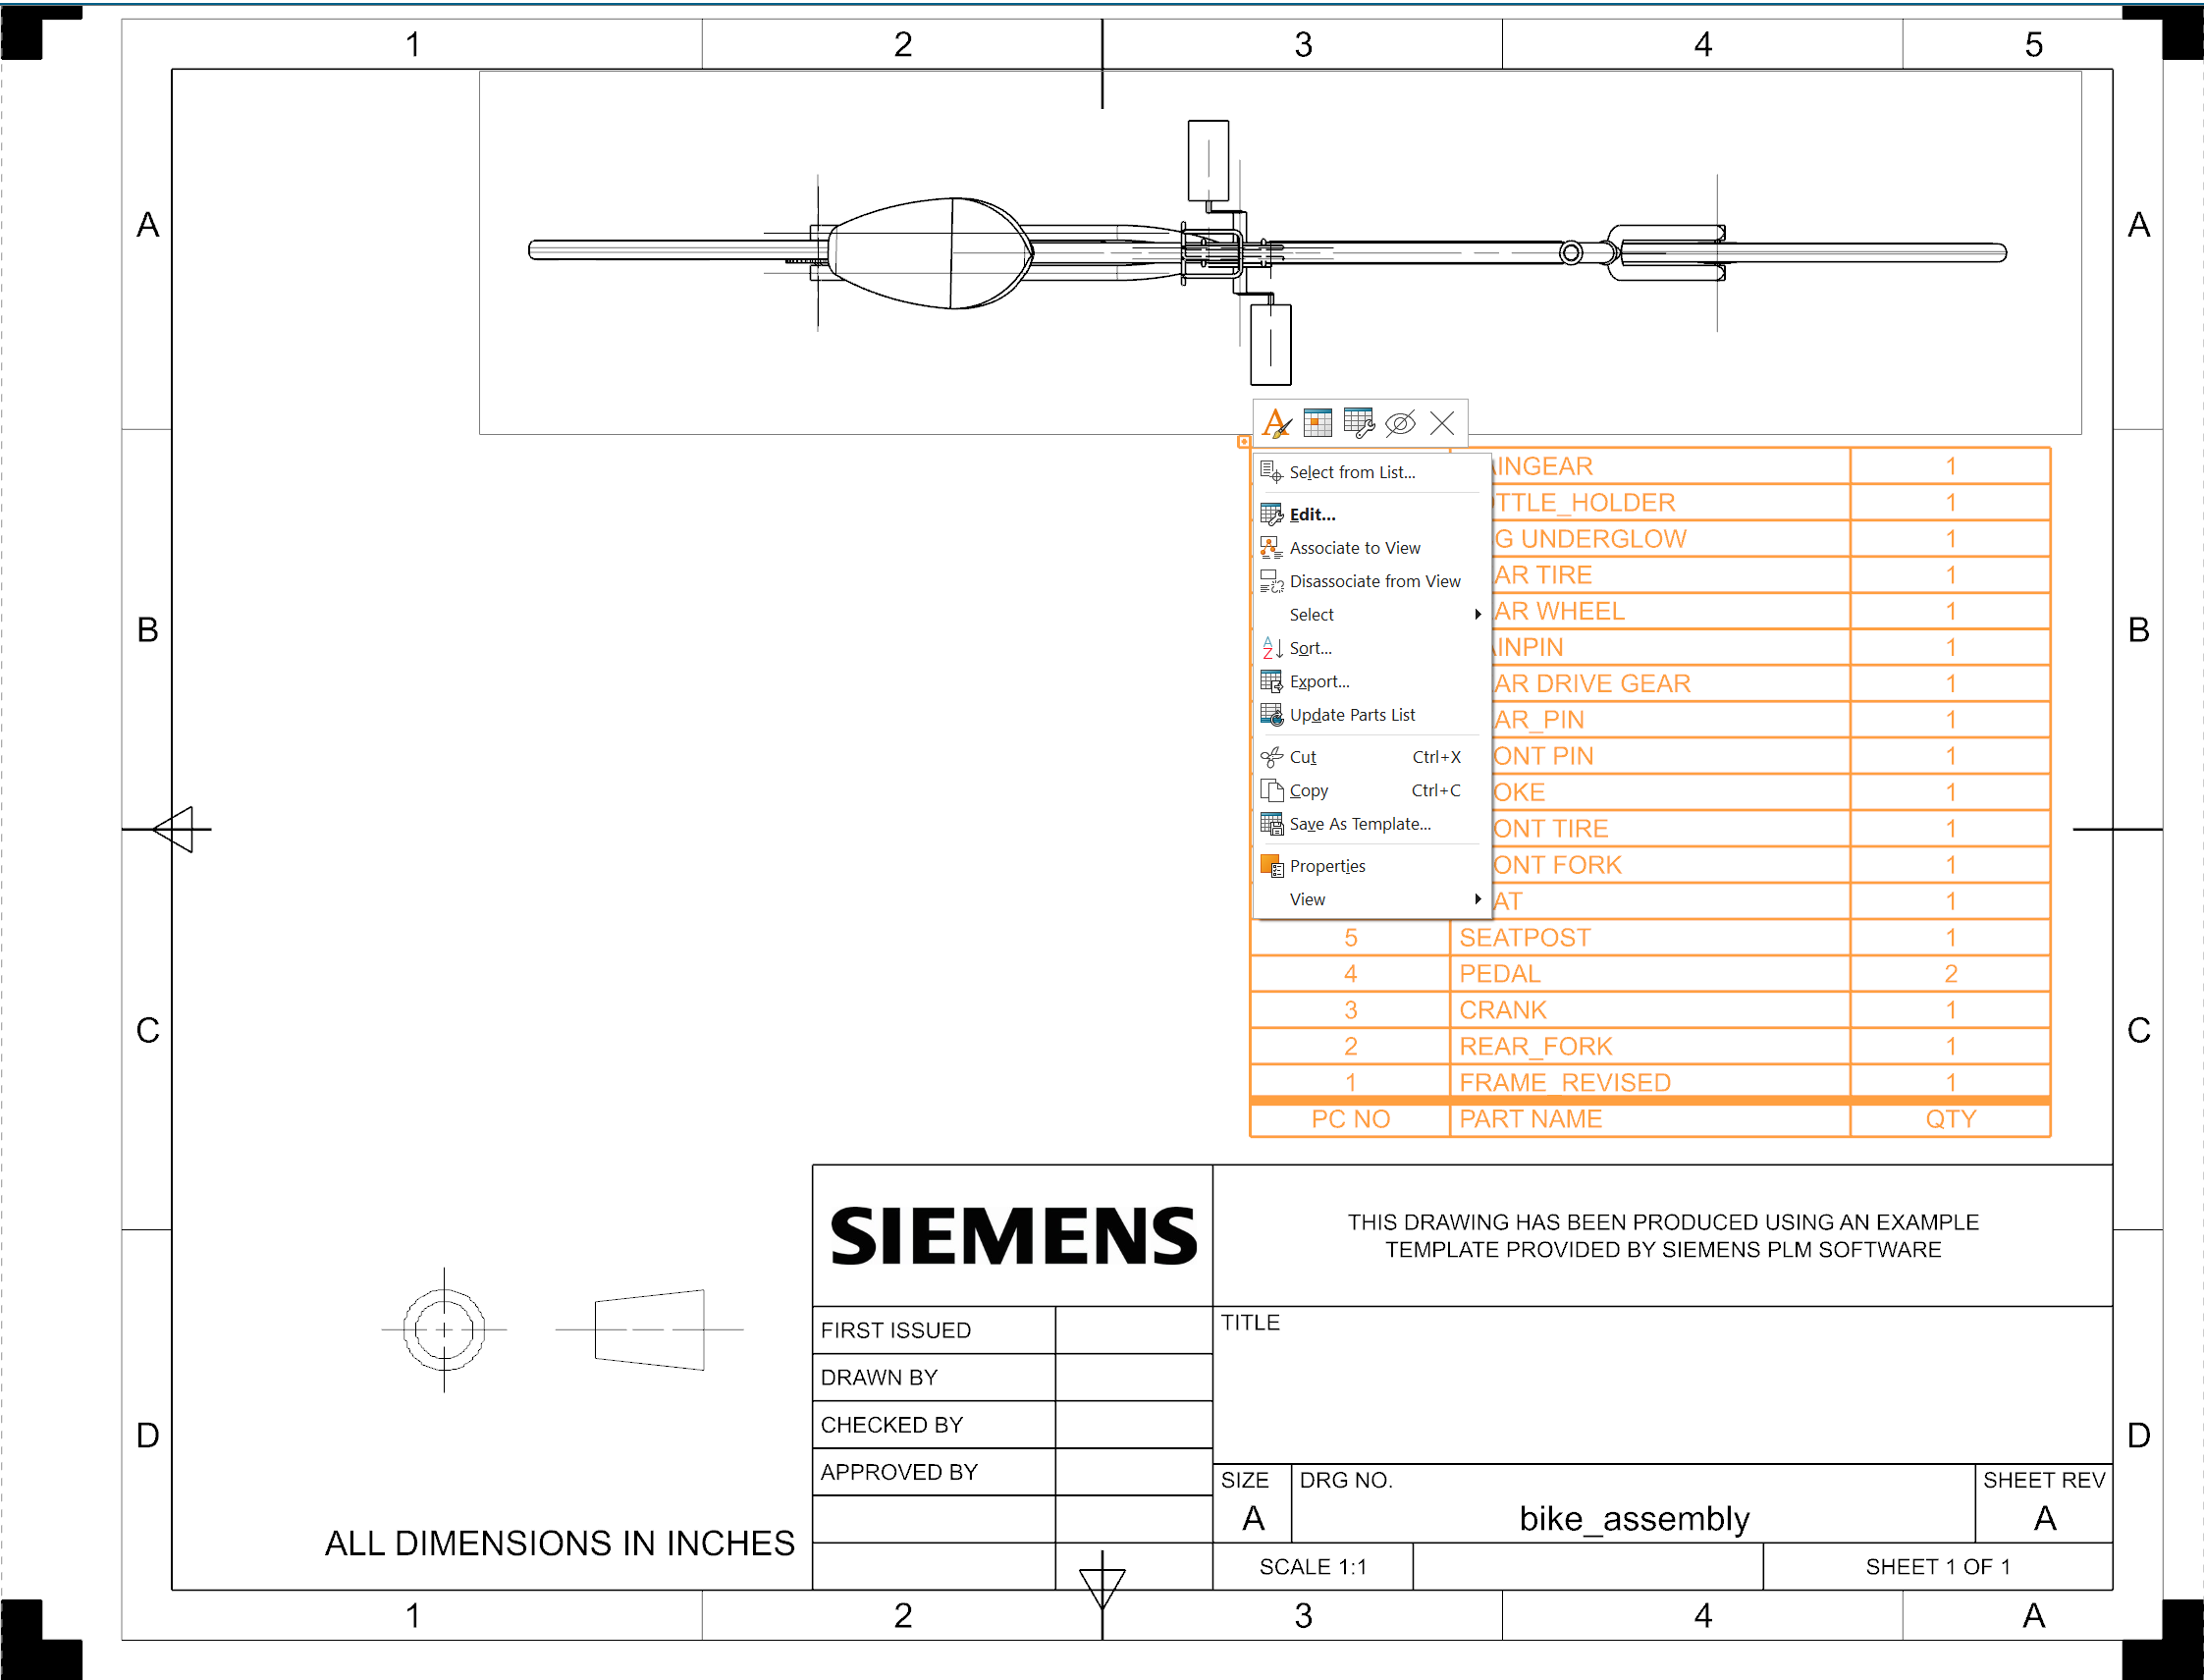
Right-click the top-left cell to find the Export option -
An Export Table dialog/window will pop up on your screen. You may have to move it into view if you don't see it otherwise. This dialog will allow you to choose the location and format. You can preview the change in the Information Window.
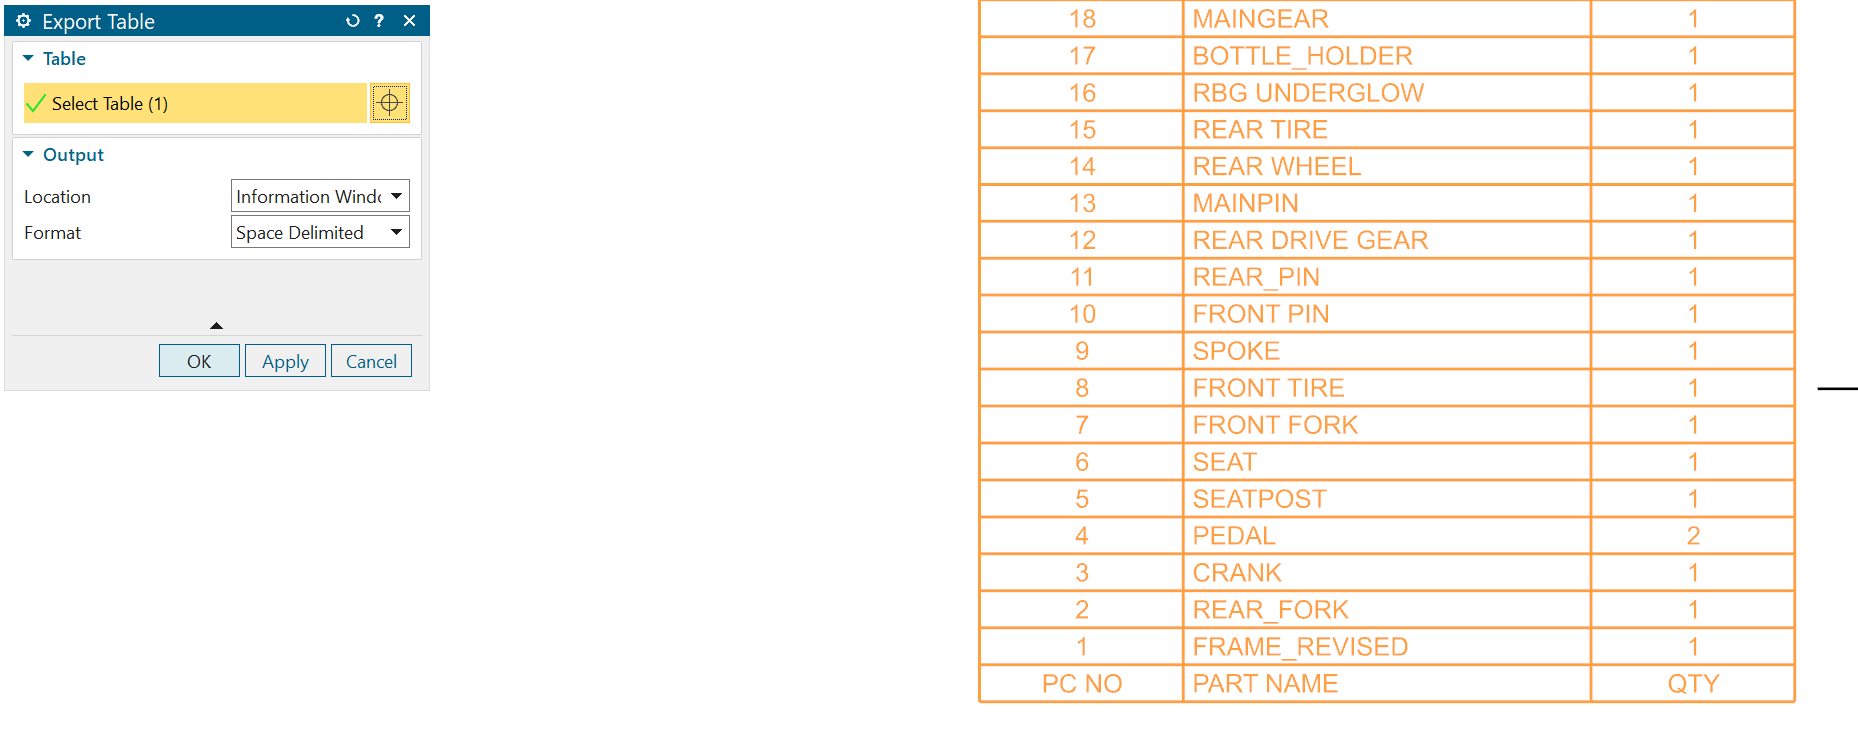
The Export Table dialog — choose your output location and format -
You will see another pop-up with a Save As button on the left. Clicking it reveals your file explorer to save the file as either an HTML or TXT file.
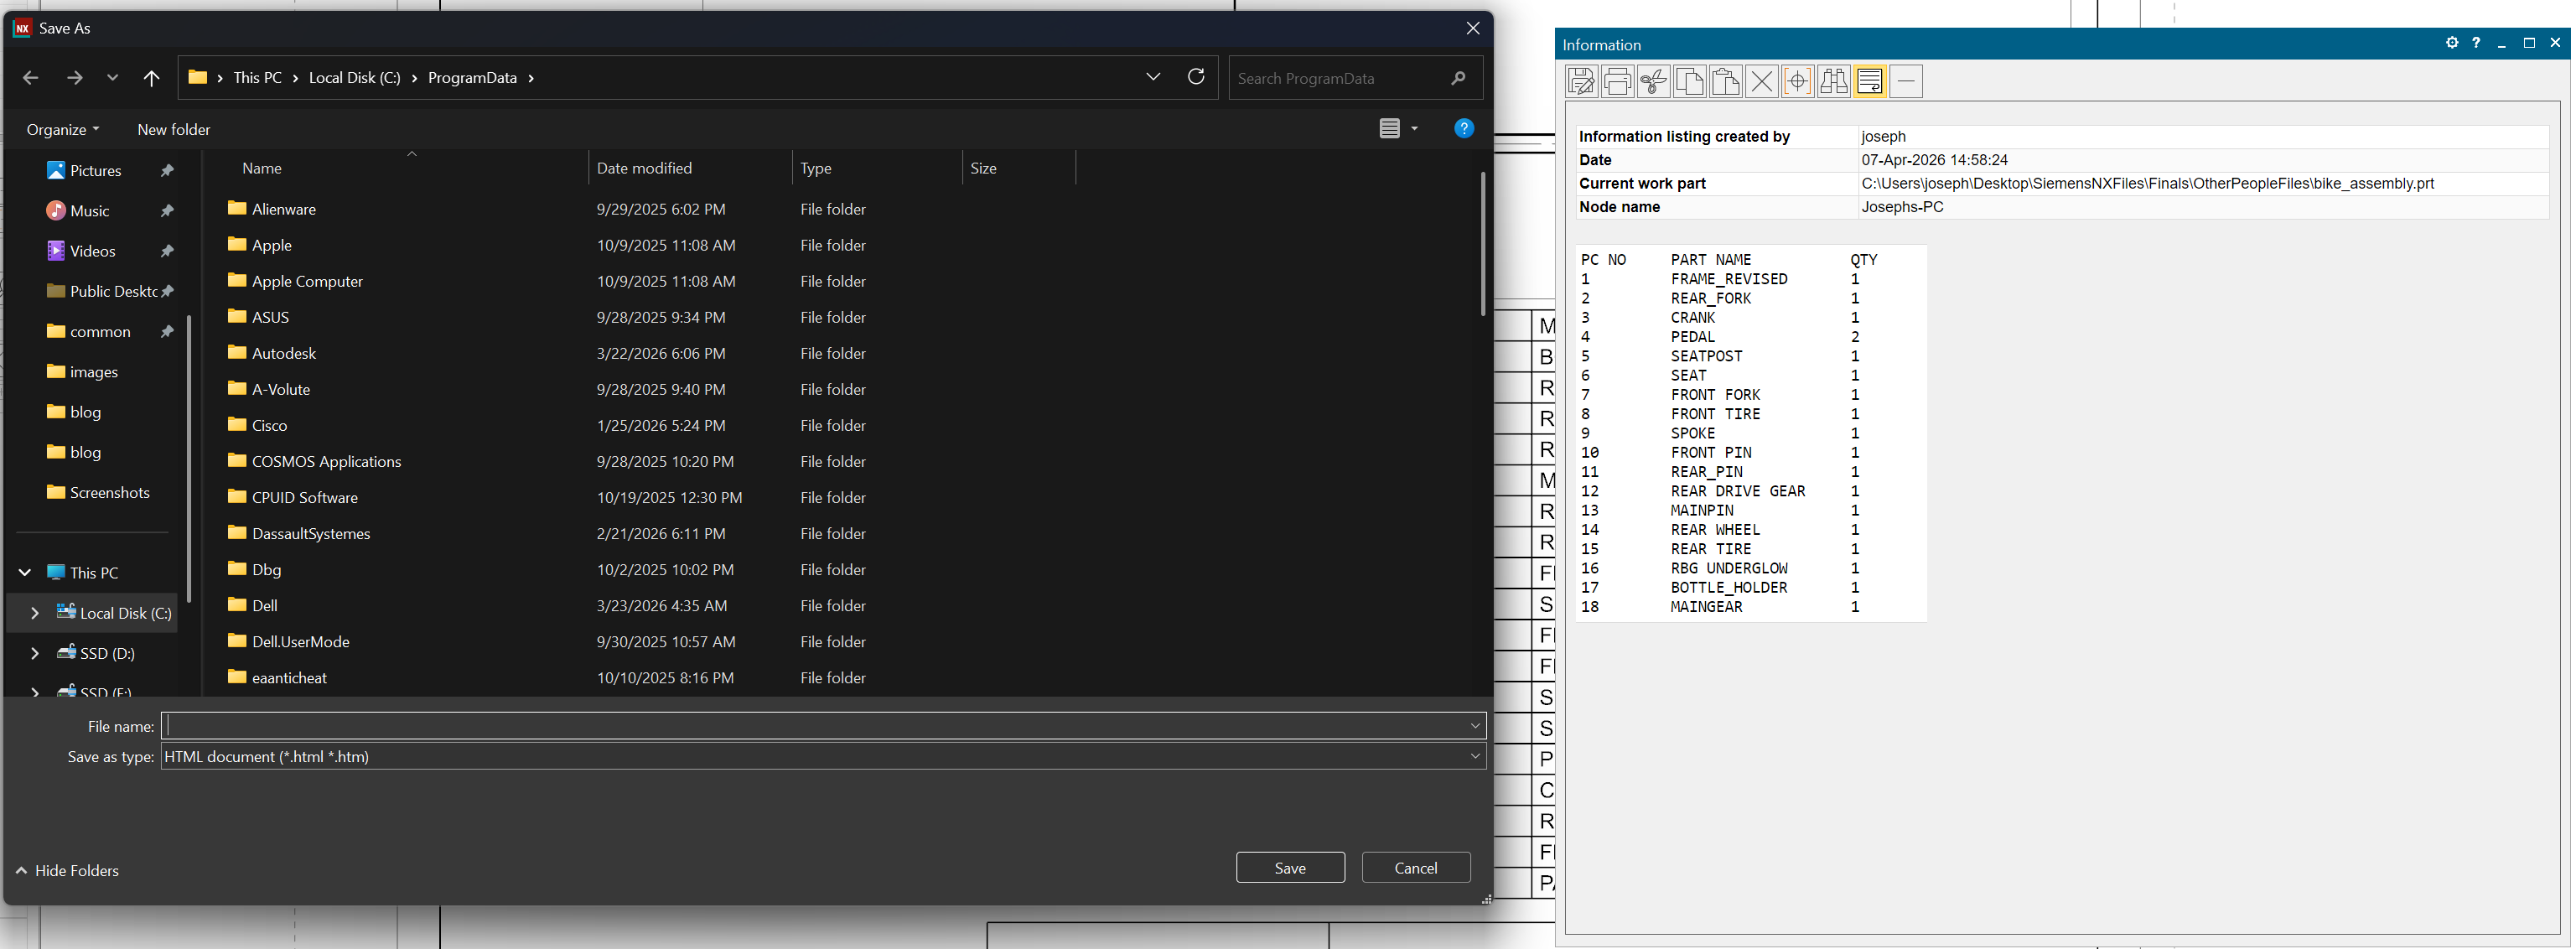
Export is limited to HTML or TXT — no direct Excel support


The catch
Unlike the Assembly Navigator method, the drawing Parts List does not export to .xlsx. You get an HTML or text file that you'd then have to open in Excel and clean up manually. For a tool as capable as NX, this is a surprising limitation.
Common Frustrations
If you're working with BOMs in Siemens NX regularly, you've probably run into:
- Teamcenter dependency — many of the more advanced BOM features (revision control, lifecycle management) assume you're running Teamcenter, which is expensive and complex to set up
- No standalone cost tracking — unit pricing and totals require a separate PLM or ERP system
- Export formatting — whether it's the indented cells from Assembly Navigator or the HTML-only output from drawing Parts Lists, exports always need cleanup
- No vendor data — part numbers, pricing, and availability aren't part of the NX workflow without an ERP integration
- No revision comparison — comparing what changed between assembly versions requires Teamcenter or manual diffing
- Overkill for small teams — NX + Teamcenter is built for enterprise. If you're a small team or solo engineer, the tooling is heavier than what you need
A Better Approach
If you need BOM management without the overhead of a full PLM system, dedicated tools can connect directly to Siemens NX.
NodeBOM extracts BOM data straight from your active NX assembly. It pulls part names, quantities, materials, and properties directly from the assembly tree. From there, you get tools that go beyond what a spreadsheet or basic parts list can do:
- Deduplicate parts across sub-assemblies with AI matching
- Track costs with budget breakdowns and price history
- Compare revisions side-by-side when the design changes
- Look up vendor pricing from 1,000+ distributors via Nexar
- Sync changes back to your NX assembly
It runs locally on your machine, keeping your data private. AI features are opt-in and only send metadata (not geometry) when you use them. It's free to try if NX's built-in BOM tools feel like overkill for your team's needs.
Whether Siemens NX's built-in parts list works for you or you need something lighter and more focused, the important thing is that your team can track what's needed without getting buried in PLM overhead.
Disclosure: This article was written by Joseph Chilcoat and AI-proofread for clarity and accuracy.
Share this article